

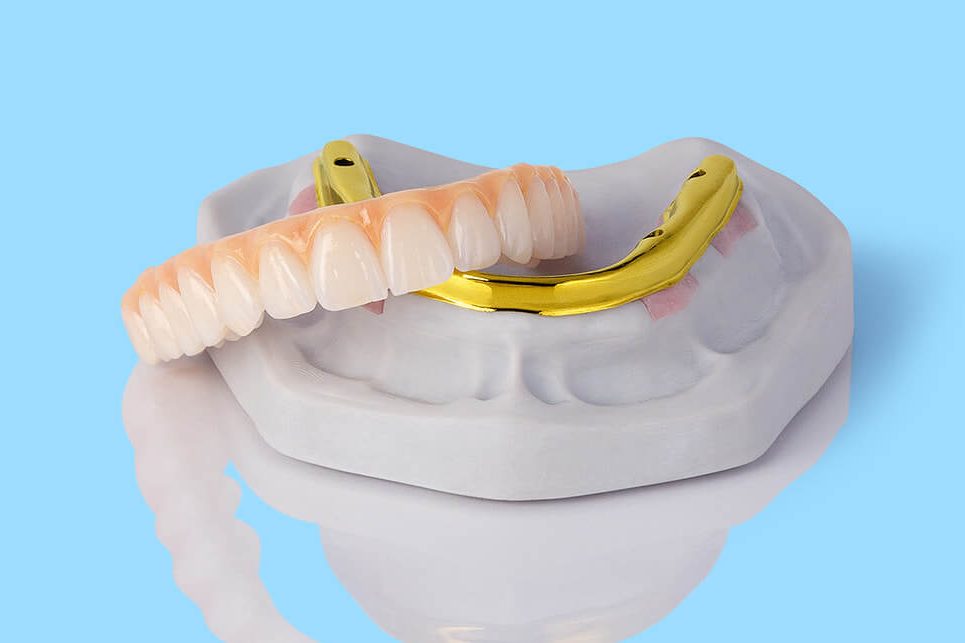
Accurate implant scanning begins with controlled scan body capture, clear soft tissue definition, and complete occlusal records during scanning for implants.

Scanning for implants requires precision. While digital workflows have improved efficiency, implant scanning remains less forgiving than tooth-supported cases. Small deviations that appear minor on screen can create significant restorative problems at delivery.
Natural teeth are supported by a periodontal ligament, which allows slight movement under load. Implants are fixed directly to bone and do not move. Because of that, even small inaccuracies during implant scanning can affect how the final restoration seats, contacts adjacent teeth, and functions in occlusion.
Many complications traced back to digital workflows share a similar pattern. The scan body was not fully seated. Its indexed surfaces were not completely captured. Soft tissue obscured the connection area. The bite record was incomplete. Critical case information was missing at submission. Each of these issues begins at the scanning stage.
The sections below outline common factors that contribute to implant failure and provide structured chairside guidance to reduce scanning errors and improve restorative outcomes.
1. Poorly seated scan body or scan flag
Improper seating of the scan body is one of the most common causes of failure during scanning for implants. Even a minimal discrepancy at the implant platform can compromise the entire restorative workflow.
What it is
During implant scanning, the scan body records the implant’s vertical position, angulation, and rotational orientation within the digital model. If it is not fully seated against the implant platform, the dataset captures a distorted position. Even a fraction of a millimetre of vertical misfit alters the virtual implant location in the CAD workflow.
Why it happens
Incomplete seating most often occurs immediately after removal of the healing abutment, and can sometimes occur due to bone growth that impedes the scan body position. Soft tissue can partially collapse into the implant interface. Minor debris or fluid may remain in the connection. Limited access or adjacent tooth interference can prevent full engagement. In some cases, the scan body is placed and tightened without deliberate visual and tactile verification.
What it causes
When the scan body is not fully seated, the CAD software designs the restoration from an incorrect implant position. This may lead to a prosthesis that does not seat intraorally or is rotated. Contacts may be open. Occlusion may be high. The restoration may appear accurate on screen and on the model, but fail clinically.
Improper seating can also interfere with correct digital library alignment. If the software cannot map the scan body geometry accurately, artefacts may appear in the digital file, and the laboratory may request a rescan.
How to prevent it
Prevention requires deliberate verification before capture begins. The field should be dry before placing the scan body. The interface should be inspected visually to confirm that the scan body sits flush against the implant platform. Dentists should feel the scan body fully engaged before finger-tightening according to manufacturer guidance.
Radiographic confirmation provides additional assurance, particularly where visibility is limited. A periapical radiograph verifies that there is no gap between the scan body and the implant platform before implant scanning proceeds.
How to fix it chairside
If incomplete seating is suspected during scanning for implants, the scan body should be removed immediately. The implant interface should be inspected and cleaned. Any soft tissue interference should be managed carefully without distorting the surrounding anatomy. The scan body should then be reseated and verified before rescanning.
2. Poor quality or incomplete scan of the scan body of scan flag
Even when the scan body is fully seated, scanning for implants can fail if the scan body’s geometry is not captured completely and clearly.
What it is
The laboratory aligns the captured scan body to a corresponding digital library file. This alignment depends on the precise capture of the scan body’s indexed surfaces, occlusal geometry, and circumferential form. If those surfaces are partially missing, blurred, or distorted, the software cannot accurately position the virtual implant.
Why it happens
Incomplete scan body capture is usually a technique issue. The scanner may not be rotated sufficiently to record the connection area where the scan body meets the tissue. The occlusal surface or indexed flats may not be fully exposed. Soft tissue can obscure critical geometry. Moisture contamination may reduce surface clarity. Rapid or uneven wand movement may interrupt stitching.
Overscanning can also degrade accuracy. Multiple passes over the same region may create overlapping mesh data, which can distort surface definition rather than improve it. Scan bodies also have a life expectancy as they degrade after use and sterilisation.
What it causes
When indexed surfaces are missing, the digital library file cannot align accurately with the captured scan body. Deficiencies in the dataset increase the risk of angular and linear deviation in the virtual implant position. The result is a restoration that does not seat passively or becomes rotated. Contacts may open. Occlusion may sit high.
How to prevent it
The scanner should follow a controlled 360-degree path around the scan body. Occlusal, buccal, lingual, and interproximal aspects must be clearly recorded. The wand should be rotated sufficiently to capture the indexed surfaces and the connection area at the tissue interface.
The field must remain dry throughout implant scanning. Soft tissue should be gently retracted to expose the geometry without distorting the anatomy, and wand movement should remain smooth and continuous to support accurate stitching.
How to fix it chairside
If incomplete scan body capture is identified while the patient is still present, the area should be dried again and selectively rescanned. The wand should be repositioned to expose any missed indexed surfaces.
Before submission, the scan body should be reviewed from multiple angles on screen to confirm complete geometry.
3. The importance of a separate scan body scan
Implant scanning accuracy depends not only on what is captured, but on how it is captured. Attempting to record soft tissue anatomy, adjacent structures, and scan body geometry in one continuous dataset increases the risk of distortion.
What it is
A separate scan body scan records the scan body after it has been seated and verified. Separating the scan body capture from the broader arch scan isolates the critical reference geometry and improves alignment reliability.
Why it happens
When scanning for implants in a single uninterrupted pass, the scanner must stitch together large volumes of data. In quadrant and full-arch workflows, cumulative stitching error can occur as the dataset grows. Small orientation drift across the arch may alter how the scan body is positioned within the final model.
In addition, surrounding soft tissue, saliva, and reflective surfaces introduce digital noise. If the scan body is captured within a complex dataset rather than as a focused capture, indexed surfaces may not be recorded with maximum clarity.
What it causes
In single-unit cases, this may present as high occlusion or incomplete seating. In multi-unit and full-arch cases, cumulative discrepancies increase the risk of non-passive fit. A binding prosthesis places stress on components and increases the likelihood of screw loosening or mechanical complication.
Where immediate loading is planned, inaccurate implant transfer compromises the position of temporary restorations and affects soft tissue management.
How to prevent it
A structured two-scan protocol reduces these risks. The arch and soft tissue anatomy should first be captured to establish orientation. Once stable, the healing abutment can be removed only when ready to proceed immediately.
After seating and verifying the scan body, a focused scan should capture its full geometry. This improves digital alignment by allowing the software to match the physical scan body to the correct library file with greater reliability. Certain scan body systems, including SmartFlags designed for two-stage capture, support this approach by enabling efficient, predictable transfer of implant position.
How to fix it chairside
If distortion or stitching drift is suspected, the scan body region should be rescanned as a dedicated dataset. If orientation error appears early in a full-arch capture, restarting the scan may provide greater accuracy than attempting digital repair.
Before submission, the scan body dataset should be reviewed independently to confirm clean geometry and stable alignment within the arch.
4. Tissue collapse or bleeding
Soft tissue management directly influences the accuracy of scanning for implants. Blood, fluid, and collapsing gingiva can interfere with scan capture and distort the emergence profile. This can compromise fit, aesthetics, and long-term biological stability.
What it is
After removal of the healing abutment, the surrounding gingiva can collapse rapidly into the implant interface. At the same time, minor bleeding or crevicular fluid may obscure the connection area. Digital scanners rely on reflected light to map surfaces. When blood or fluid is present, light scatter reduces surface clarity. When tissue collapses, the true emergence profile is not recorded.
Why it happens
Tissue collapse occurs quickly once the healing abutment is removed. If scanning does not begin immediately, the gingiva may obscure the implant connection. Bleeding may occur due to minor trauma during abutment removal or manipulation. Inadequate moisture control compounds the issue.
What it causes
When tissue obscures the implant interface, critical connection details may be missed. When blood or fluid distorts optical data, the scan may contain incomplete or inaccurate geometry. The laboratory may be unable to define the emergence profile correctly.
This can lead to restorations that do not seat fully or require significant adjustment. In the longer term, poorly contoured restorations increase the risk of peri-implant mucositis and peri-implantitis.
How to prevent it
The healing abutment should be removed only when ready to proceed immediately with implant scanning. The scan body should be seated promptly to reduce tissue collapse.
Moisture control is essential. Suction and air should be used to maintain a dry field. Haemostatic agents such as aluminium chloride may be used to control bleeding when required. Soft tissue should be gently retracted to expose the implant margin without distorting anatomy.
How to fix it chairside
If tissue collapse occurs, retraction cord, retraction paste, or other appropriate methods may be used to re-expose the implant interface. The area should be dried thoroughly before rescanning.
If bleeding obscures the scan, haemostasis must be achieved before attempting capture again. Selective rescanning of the affected region should occur while the patient remains in the chair.
5. Missing occlusion and adjacent structure data
Accurate implant scanning does not stop at the scan body. Even when implant position is captured accurately, missing occlusion or neighbouring structures can result in misfit, high occlusion, and biomechanical complications.
What it is
The scan must include enough surrounding anatomy to establish spatial orientation. This means capturing adjacent teeth in the working quadrant, scanning the opposing arch, and recording a clear buccal bite in maximum intercuspation.
Why it happens
Incomplete occlusal and adjacent capture often occurs when scanning is limited to the immediate implant site. Time pressure may lead to minimal capture of neighbouring teeth.
What it causes
If occlusal data is incomplete, the final crown may sit high in occlusion. High occlusion places biomechanical stress on the implant components. This increases the risk of screw loosening, abutment complications, or ceramic fracture.
Improper contour design due to missing adjacent anatomy may create plaque-retentive areas and compromise hygiene. Over-contoured or under-contoured emergence profiles increase the risk of peri-implant mucositis and peri-implantitis.
How to prevent it
During implant scanning, the entire quadrant should be captured from canine to terminal tooth. In distal or non-tooth-bound sites, a full-arch scan is recommended to reduce orientation drift. The opposing quadrant should include a comparable number of teeth to support accurate articulation.
Before performing the bite scan, the scan body should be removed. This allows the working arch and opposing arch datasets to stitch correctly while preserving accurate implant positioning within the model.
The buccal bite scan should be captured only when the patient is firmly in maximum intercuspation. Activation of the scanner should occur once this position is stable. Live inspection of the articulated digital model should occur before the patient leaves the chair to confirm correct alignment.
How to fix it chairside
If occlusal alignment appears unstable on screen, selective rescanning of the bite region should occur immediately. If adjacent structures are incomplete, additional scanning should be performed to extend the dataset to the required anatomical landmarks.
If the scan body was left in place during the bite capture, it should be removed and the bite scan repeated to allow correct stitching.
6. The importance of a separate soft tissue scan
The surrounding soft tissue defines the emergence profile, influences aesthetics, and plays a central role in long-term biological stability. A dedicated soft tissue scan, captured separately from the scan body scan, improves predictability in implant scanning workflows.
What it is
A separate soft tissue scan involves capturing the gingival contours around the implant without the scan body in place. This scan records the precise shape, volume, and contour of the tissue that will support the final restoration.
The emergence profile refers to the transition from the implant platform through the gingiva to the visible crown. Accurate transfer of this anatomy allows the laboratory to design a patient-specific abutment and crown that respect existing tissue contours.
Why it happens
Soft tissue around implants can change rapidly. When a provisional crown or healing abutment is removed, the gingiva may collapse within seconds. If this anatomy is not captured promptly and deliberately, the digital model will not reflect the true emergence contour that has been established.
If only the scan body is captured, the laboratory may lack sufficient tissue data to design optimal contour and hygiene access. A separate soft tissue scan isolates this anatomical information and improves digital accuracy.
What it causes
Without accurate soft tissue data, the final crown may be over-contoured or under-contoured. This affects aesthetics and may result in visible black triangles or unnatural gingival transitions and severe pain.
Inadequate contour can create plaque-retentive areas that compromise hygiene. Poor soft tissue adaptation reduces the effectiveness of the biological seal between the gingiva and implant surface. This increases the risk of mucositis and peri-implantitis over time.
How to prevent it
The healing abutment or provisional should be removed only when ready to capture the emergence profile immediately. The area should be dried thoroughly to prevent optical distortion, and tissue contours should be recorded clearly before seating the scan body.
In aesthetic cases, intraoral photographs may support communication of gingival margin levels and desired outcomes.
How to fix it chairside
If soft tissue capture appears incomplete or distorted, selective rescanning is likely required. If tissue collapse has already occurred, gentle retraction or temporary re-contouring may be required before rescanning.
7. Incomplete implant information and instructions
Dental labs also rely on clear, complete prescription information to design and manufacture the correct restoration. Even a technically sound scan can fail if critical implant or case details are missing.
What it is
Incomplete implant information refers to missing or unclear details accompanying the digital scan. This includes implant brand and platform, scan body identification, restoration type, material selection, shade, and confirmation of opposing arch and bite records.
Why it happens
Incomplete case notes often occur when digital workflows are assumed to replace written communication. If the scanner software does not prompt for mandatory fields, key details may be overlooked. In busy workflows, implant system information or shade selection may not be documented clearly.
In some cases, scan body identification is not specified. Because many implant systems and platforms appear similar digitally, misidentification increases the risk of incorrect component selection.
What it causes
When essential information is missing, the lab must pause production to seek clarification. This creates workflow delays and extends turnaround time. If clarification is not obtained promptly, scheduling disruption may occur.
If production proceeds based on assumption, the restoration may be fabricated using the wrong implant library, incorrect material, or unsuitable shade. This may result in poor fit, occlusal discrepancy, aesthetic dissatisfaction, or component misalignment.
How to prevent it
Clear documentation should define the implant brand and platform, restoration type, material selection, shade, and confirmation that opposing and bite records are included.
In aesthetic zones, intraoral photographs support communication of gingival contours and shade nuances. Verification of scan body seating prior to submission should be confirmed, ideally supported by radiographic review where indicated.
How to fix it chairside
If the lab contacts the practice for clarification, prompt response reduces production delay. Clear, complete instructions combined with accurate implant scanning reduce guesswork, minimise delays, and support predictable restorative outcomes.
Minimum information required for implant case submission
Before submitting any implant case to your lab, use this checklist to confirm that the following information is included as part of the case submission:
- Implant brand and platform
- Scan body identification
- Type of restoration required
- Material selection
- Shade
- Opposing arch data
- Bite record
Avant Dental is a full-service dental laboratory. To find out more about working with us, please email [email protected] or phone 1800 287 336.
This blog is part of our Intraoral Scanning blog series, designed to help dentists get more predictable results from digital workflows. Explore the full series below: